Imagine stepping out into your backyard, greeted by the gentle warmth of your spa and the inviting ambiance of a personal bar, all sheltered under a charming pergola. This isn’t a dream, but a perfectly achievable reality with a small pergola tailored to elevate your outdoor relaxation space.
Creating a Tranquil Oasis: Small Pergolas for Spas and Bars
A small pergola offers the ideal solution for those wanting to add a touch of elegance and function to their spa and bar area. It provides:
- Defined Space: The pergola naturally sections off the spa and bar area, creating a sense of intimacy and purpose.
- Shade and Shelter: Enjoy your spa and refreshments comfortably protected from harsh sunlight or light rain.
- Style Boost: Pergolas instantly enhance the visual appeal of any outdoor space, adding architectural interest and charm.
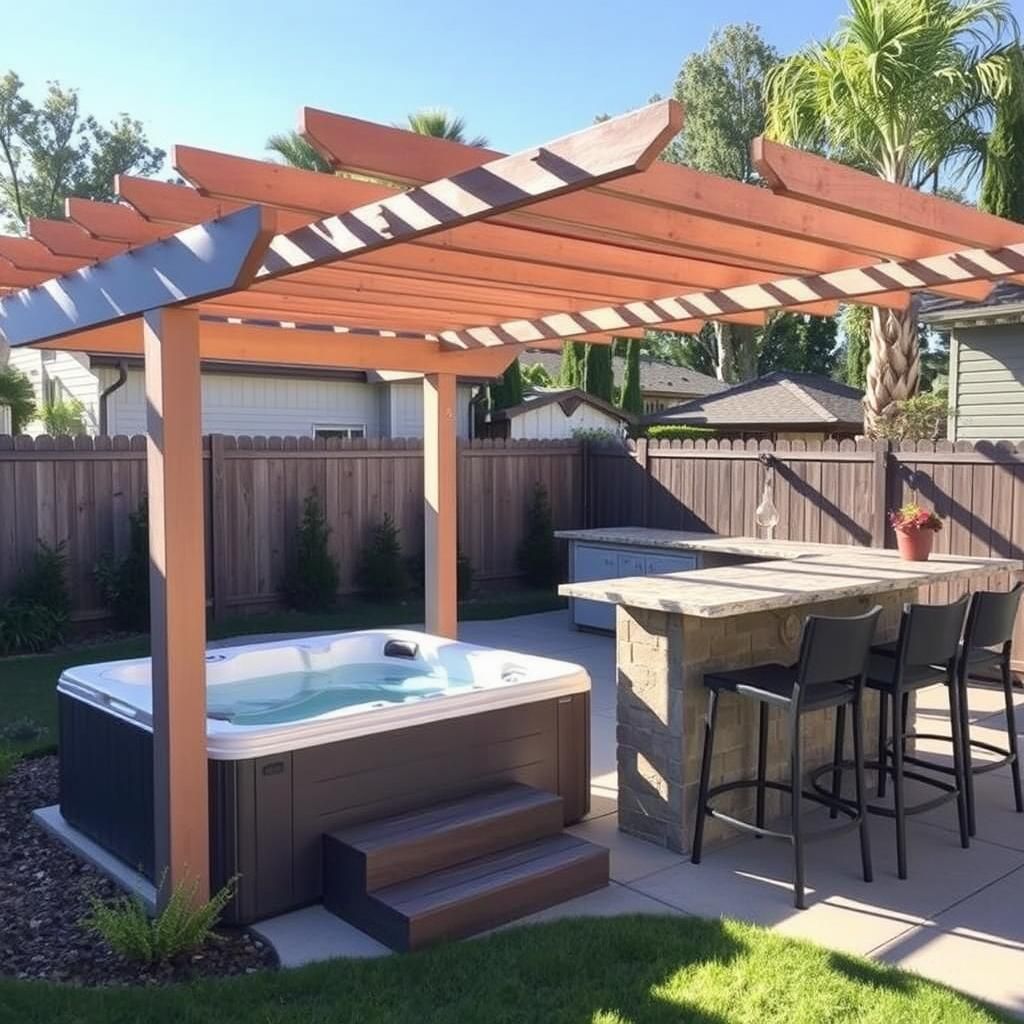 Small pergola over spa and bar area
Planning Your Small Pergola Project
1. Location is Key
First, determine the best placement for your pergola. Consider:
- Proximity to Spa and Bar: Ensure easy access between the pergola and your existing or planned amenities.
- Sun Exposure: Observe the sun’s path to maximize shade during the hottest parts of the day.
- Views and Privacy: Position the pergola to enjoy scenic views while maintaining privacy if desired.
2. Size and Design Considerations
For a small pergola, a square or rectangular shape often works best. Think about:
- Functionality: How many people do you want to accommodate under the pergola? Will you need space for furniture besides the bar and spa?
- Materials: Wood like cedar or redwood offers natural beauty, while vinyl requires less maintenance. Metal pergolas provide a sleek, modern look.
- Style: Choose a pergola design that complements your existing outdoor aesthetic, whether traditional, contemporary, or rustic.
3. Essential Materials
- Pergola Kit or Lumber: Opt for a pre-designed kit for easier assembly or purchase individual lumber pieces for a custom look.
- Concrete Mix (for footings): Provides a stable base for the pergola posts.
- Fasteners: Choose rust-resistant screws and nails specifically designed for outdoor use.
- Finishing Touches: Consider adding decorative elements like lattice panels, climbing plants, or outdoor curtains for enhanced privacy and aesthetics.
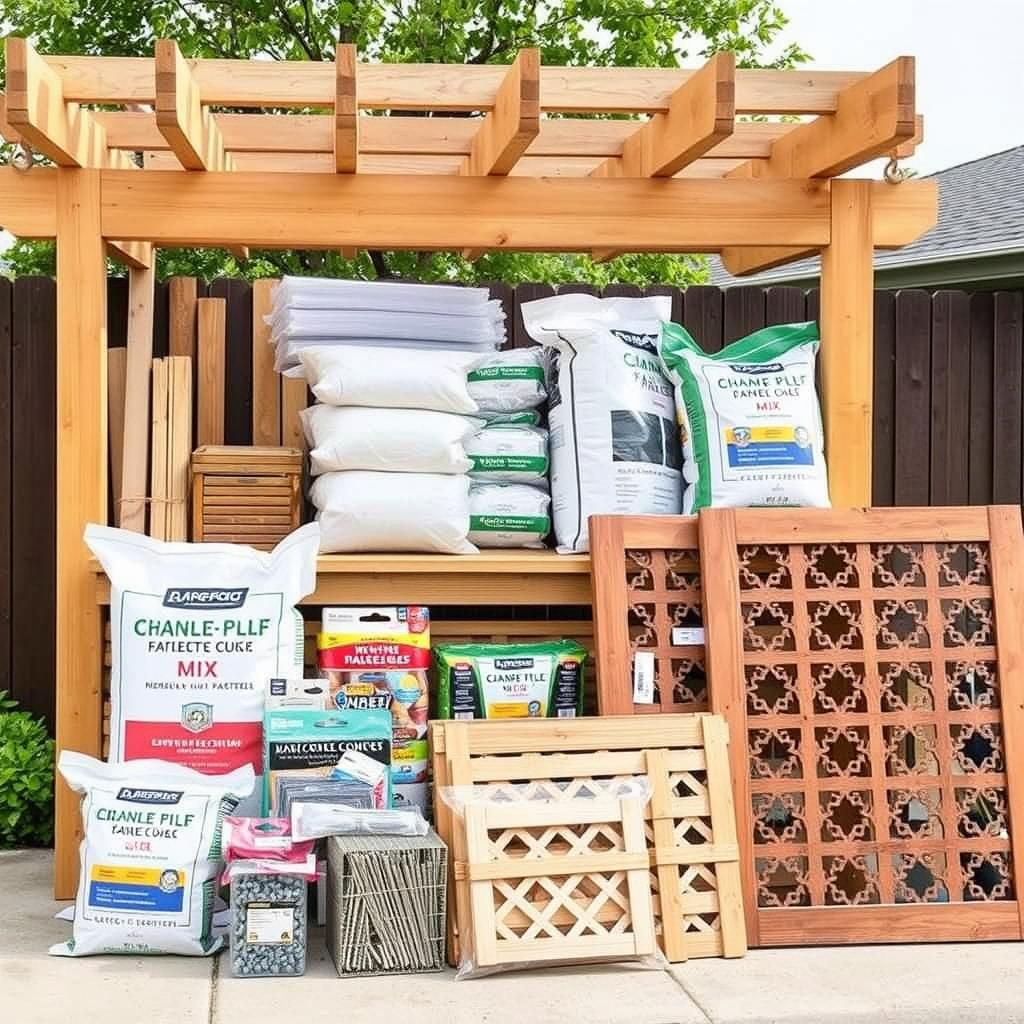 Essential materials for building a pergola
4. Bringing Your Vision to Life: Building Your Small Pergola
- Prepare the Site: Clear the area of any vegetation, level the ground, and mark the pergola post locations.
- Set the Posts: Dig holes for each post, ensuring they are level and plumb. Pour concrete into the holes, securing the posts firmly in place.
- Attach the Beams: Securely fasten the beams to the posts, creating the pergola’s framework.
- Add the Rafters: Install the rafters across the beams, spacing them evenly for optimal shade and visual appeal.
- Finishing Touches: Apply any desired stains or sealants to protect the wood and enhance its natural beauty.
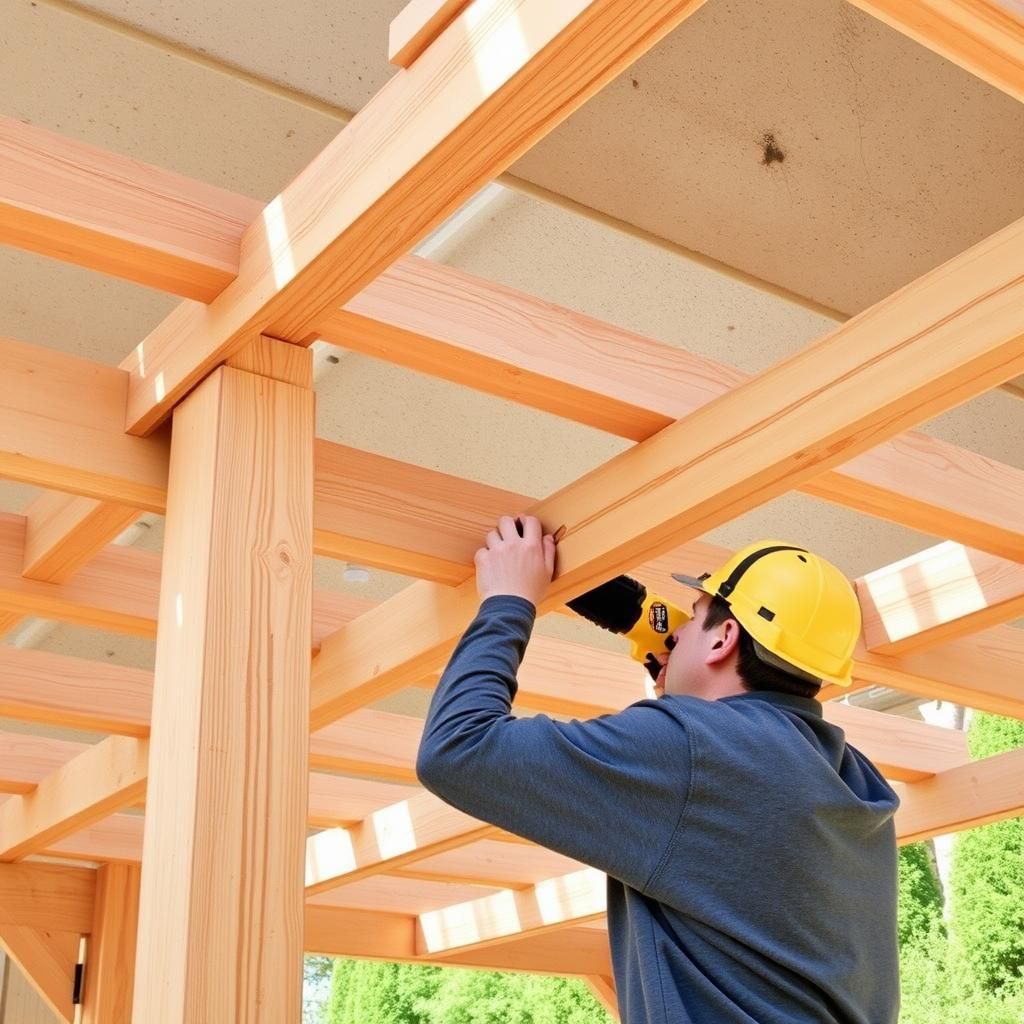 Installing wooden rafters on a pergola frame
5. Expert Tips for Success
- “Always prioritize safety when working with tools and lumber. Wearing appropriate safety gear is crucial,” advises John Miller, author of “The Backyard Builder’s Guide to Pergolas.”
- Consult with a structural engineer if you live in an area with high winds or heavy snowfall. They can ensure your pergola is built to withstand local weather conditions.