A pergola can transform your outdoor space, adding a touch of elegance and creating a welcoming ambiance. But have you considered the unique charm of a triangle pergola? Triangle pergolas, also known as slanted pergolas, offer a modern twist on the traditional design and can be the perfect solution for unusual spaces or those looking for a statement piece.
Embracing the Uniqueness of Triangle Pergolas
Triangle pergolas provide an array of benefits:
- Visually Interesting: The slanted roofline adds a dynamic element, making your outdoor space stand out.
- Ideal for Small Spaces: They maximize usable space, fitting snugly into corners or against walls.
- Versatile Design: Triangle pergolas can be freestanding or attached to your house, offering flexibility in design.
- Ample Shade: The angled roof allows for adjustable shade throughout the day.
Designing Your Perfect Triangle Pergola
Before you start building, consider these factors:
1. Placement: Determine the best location considering sunlight, prevailing winds, and views.
2. Size: Measure your space carefully to ensure the pergola fits comfortably.
3. Materials: Choose durable materials like cedar, redwood, or pressure-treated pine for the frame.
4. Style: Complement your home’s architecture with a modern, rustic, or traditional design.
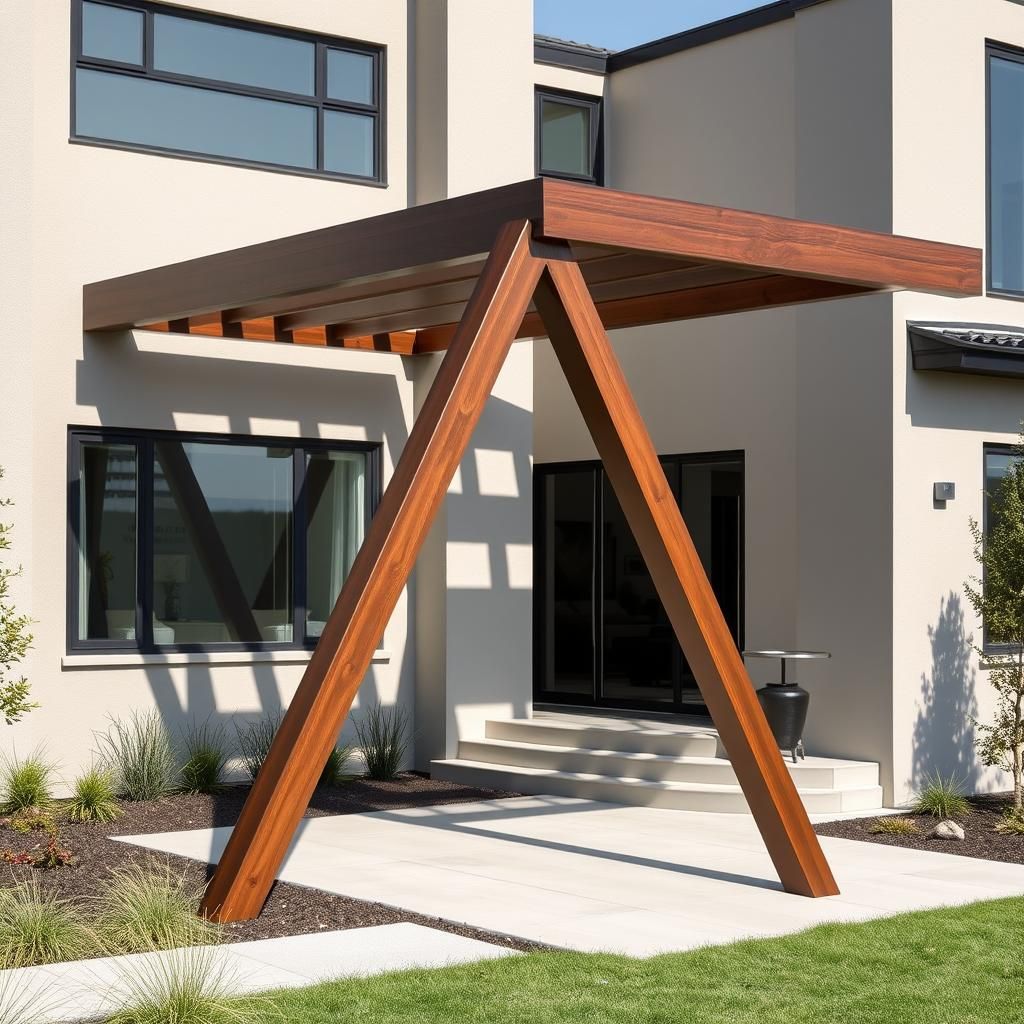 Modern Triangle Pergola
Building a Simple Triangle Pergola
Here’s a basic guide for constructing a simple triangle pergola attached to your house:
Materials:
- Pressure-treated lumber (posts, beams, rafters)
- Concrete mix
- Fasteners (screws, nails)
- Outdoor sealant
- Post base connectors
Tools:
- Saw (circular saw or miter saw)
- Drill
- Level
- Post hole digger
- Safety glasses
Instructions:
- Plan and Mark: Determine the pergola’s dimensions and mark the post locations on the wall and ground.
- Set the Posts: Dig holes for the posts, ensuring they are level and plumb. Secure the posts using concrete and post base connectors.
- Attach the Ledger Board: Attach a ledger board to the wall of your house, ensuring it is level and securely fastened.
- Install the Beams: Cut the beams to size and secure them to the ledger board and the posts.
- Cut and Attach Rafters: Cut the rafters at an angle to create the slanted roof. Attach them to the beams with equal spacing.
- Finishing Touches: Add any desired finishing touches, such as lattice panels, a shade cloth, or decorative trim.
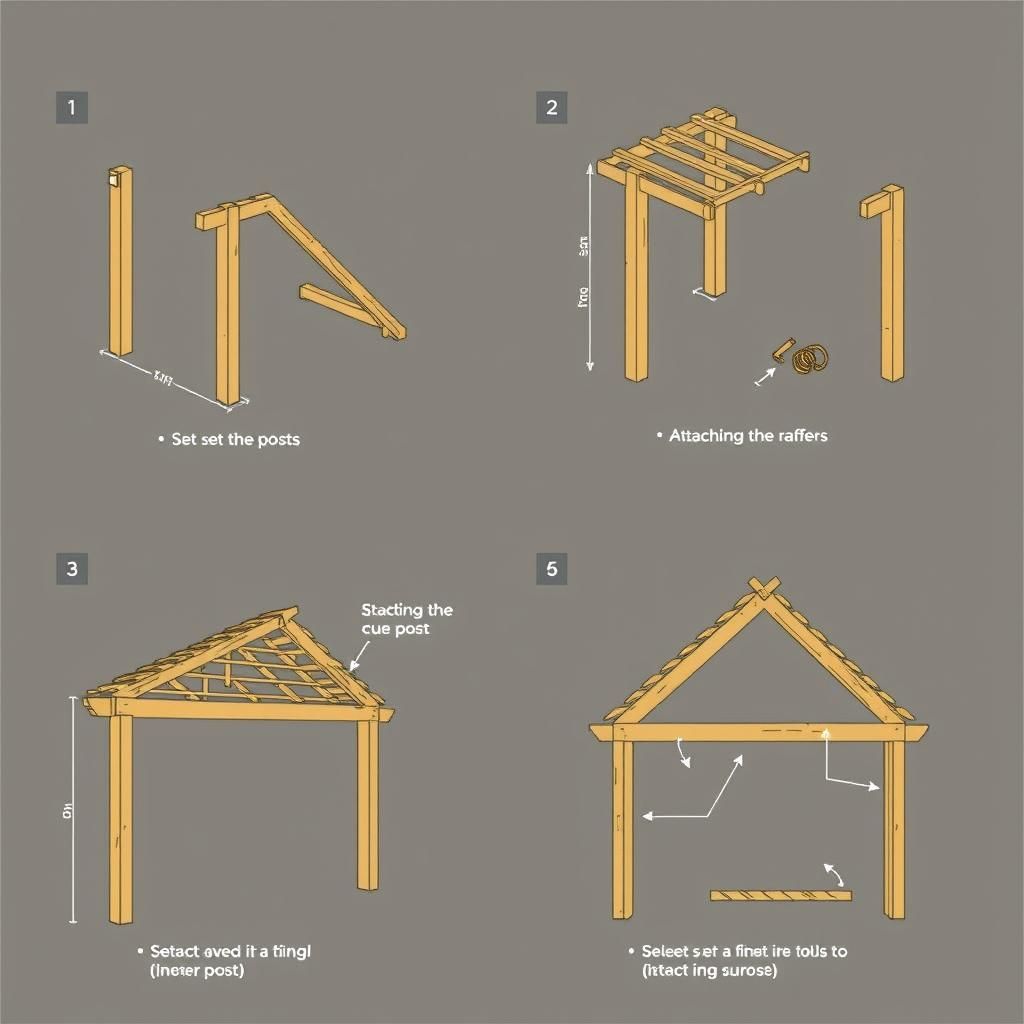 Triangle Pergola Construction
Tips for Success
- Consult Local Building Codes: Check for permits and regulations before starting your project.
- Use Quality Materials: Invest in durable, weather-resistant materials to ensure longevity.
- Consider Professional Help: For complex designs or if you’re not comfortable with DIY projects, consult a professional contractor.
“A well-designed triangle pergola can add significant value to your home,” says landscape architect Sarah Miller, author of “Outdoor Living Spaces.” “It not only enhances the aesthetics but also extends your living area and creates an inviting space for relaxation and entertainment.”
Conclusion
Triangle pergola ideas offer a world of possibilities to create a unique and functional outdoor space. By carefully planning, choosing the right materials, and following proper construction techniques, you can build a stunning triangle pergola that will provide years of enjoyment.
What are your favorite ways to personalize a triangle pergola? Share your thoughts and ideas in the comments below!